Generally divided into contact 3D scanners and non-contact 3D scanners. Among them, the non-contact three-dimensional scanner is further divided into a raster three-dimensional scanner (also called a photo-type three-dimensional scanner) and a laser scanner. The three-dimensional scanning of the grating has white light scanning or blue light scanning, and the laser scanner has a difference of laser, line laser and surface laser.
3D scanner function:
1: The purpose of the 3D scanner is to create a point cloud of the geometric surface of the object. These points can be used to interpolate the surface shape of the object. The denser the point cloud can create a more accurate model (this process is called 3D reconstruction). ). If the scanner can obtain the surface color, the texture map can be further pasted on the reconstructed surface, which is called texture mapping.
2: 3D scanners can be modeled as cameras, their line of sight is conical, and the collection of information is limited to a certain range. The difference between the two is that the camera captures color information, while the 3D scanner measures the distance.
Handheld 3D scanner
Handheld 3D scanner principle: Line laser handheld 3D scanner with its own calibration function, using 635nm red line laser flash, equipped with a flash and two industrial cameras, working on the laser line to the object, two cameras To capture the three-dimensional scan data of this moment, due to the different curvature of the surface of the object, the light will be reflected and refracted on the object, and then the information will be converted into a 3D image by third-party software. As the scanner moves, the light changes and the software recognizes the changes in time and processes them. The frequency of the light being projected onto the scanned object is as high as 28,000 points/s, so moving the scanner during the scanning process can also achieve good scanning results even when the scanning is fast. The handheld 3D scanner works with a reflective type. Corner marker, used with scanning software, supports photogrammetry and self-calibration techniques.
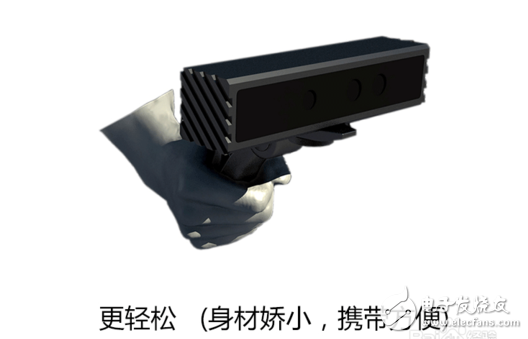
Positioning the target allows the operator to move the object 360° in any way it needs. A truly portable handheld 3D scanner that fits into a suitcase and is easy to carry to the job site or between factories. Achieve some of the highest data quality of laser scanning technology, maintaining a high resolution while maintaining a large triangle on the plane to generate smaller STL files. The shape and weight distribution of the device is beneficial for long-term use and avoids musculoskeletal problems. Versatile and user-friendly, allowing objects in virtually any size, shape or color to be scanned in tight spaces.
The principle of the handheld 3D scanner is based on the original design of the camera-based 3D scanner. It scans the point cloud image of the surface of the object. These points can be used to interpolate the surface shape of the object. The denser the point cloud, the more accurate the model is. , can be 3D reconstruction.
With the maturity of domestic 3D scanner technology and its popularity in all walks of life, 3D scanning technology has become an important technical support in manufacturing, plays an indispensable role, and gradually forms a new science. How to operate 3D scanners correctly and efficiently has become a concern of many companies. When using the same 3D scanner to scan the same object, different operators will get a certain difference in the degree of data results. The reason is the scanning skills that the scanner has mastered during the operation. It is easier to master the operating principle of 3D scanners, but if you want to become a "scanning expert" you need some learning and repeated operations.
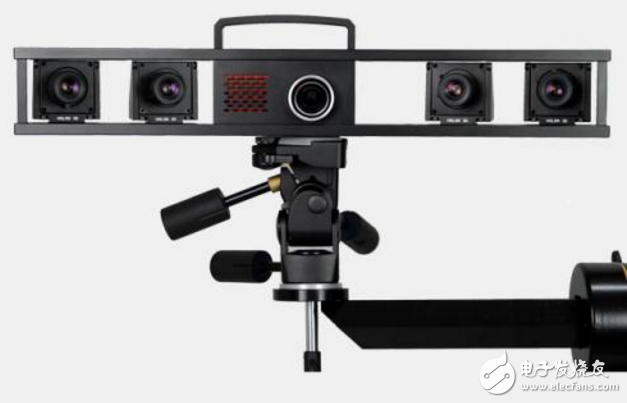
3D optical scanners: mainly include 3D laser scanners and camera-type 3D scanners. This case takes the example of a photo-based 3D scanner, which is an example of how to quickly master the operation of a 3D optical scanner:
How to use the 3D scannerTools/raw materials
3D scanner
computer
First, preparatory work in the early stage (mainly in three steps)
1Step 1: Ensure a stable 3D scanning environment
To perform 3D scanning, you must first ensure that the 3D scanner is built in a stable environment (including light environment: avoiding strong light and backlighting; 3D scanner stability), to minimize environmental damage and ensure 3D scanning. The result is not affected by external factors.
2Step 2: 3D scanner calibration (need to learn)
Calibrating the machine is a critical step before 3D scanning. The 3D scanner needs to know what environment it is scanning in order to scan accurate 3D data. During the calibration process, the position of the scanning device relative to the scanned object is calculated according to the scanning mode preset by the 3D scanner.
When calibrating the scanner, adjust the 3D scanning environment of the device system settings according to the scanning object. Proper camera settings can affect the accuracy of the scanned data, so you must ensure that the exposure settings are correct. Perform calibrations in strict accordance with the manufacturer's instructions and carefully correct inaccurate 3D data. After calibration, the alignment can be checked by scanning a measurement object with known three-dimensional data with a 3D scanner. If the accuracy of the scanner scan is found to be unachievable, the scanner needs to be recalibrated.
3Step 3: Processing the surface of the scanned object
Surface scanning of some objects is more difficult. These objects include translucent materials (glassware, jade), shiny, or darker objects. For these objects, a matte white developer is required to cover the surface of the object to be scanned, and a thin layer of developer is sprayed on the scanned object in order to better scan the three-dimensional features of the object, and the data is more accurate. It should be noted that if the developer is sprayed too much, the thickness of the object will be superimposed, which will affect the scanning accuracy. Note: The developer will not cause damage to the surface of the object and the human body. After the scan is completed, it can be washed off with water.
Second, start scanning work
After the preparation is completed, the object can be scanned. Use a 3D scanner to capture three-dimensional data from different angles of the scanned object, change the way the object is placed or adjust the direction of the camera of the 3D scanner to scan the object in all directions.
Third, post-processing work (mainly in two steps, relatively simple)
1Step 1: Point cloud processing
At present, the popular 3D scanners are all point cloud automatic splicing methods, and no manual splicing is required. After the surface of the object is scanned, the system automatically generates a 3D point cloud image of the object. However, the operator is required to remove the noise (ie, excess point cloud) from the scanned point cloud data and smooth it.
2Step 2: Data Conversion
After the point cloud is processed, the data is converted. Currently, the system software automatically converts the point cloud data into the STL file. The generated STL data can be interfaced with commercially available 3D software.
FM AM Antenna,FM AM Radio Antenna,FM AM Antenna for CAR,Fm AM Antenna Marine,FM AM Antenna for home Stereo
Yetnorson Antenna Co., Ltd. , https://www.yetnorson.com